Hey there! In today’s tech-driven world, being able to access your IoT devices remotely using SSH has become a game-changer for both tech enthusiasts and professionals. Whether you're controlling smart home gadgets, monitoring industrial equipment, or managing remote servers, having secure access is absolutely essential. In this guide, I’m going to walk you step-by-step through setting up IoT SSH from anywhere, completely free, using the Windows 10 Command Line. Let’s dive in!
Technology has come a long way, and IoT (Internet of Things) has completely transformed how we interact with our devices. But here’s the thing—ensuring that you can access these devices securely and reliably from anywhere can be tricky. That’s where SSH (Secure Shell) comes in. SSH is a cryptographic network protocol that provides a super-secure way to access your IoT devices remotely. It’s like having a digital key that lets you into your devices no matter where you are.
This guide is designed to give you everything you need to set up SSH on your Windows 10 machine and configure your IoT devices for remote access. Whether you're just starting out or you're already a tech wizard, this article will equip you with the knowledge and tools to make remote connectivity seamless and secure. Let’s get you connected!
Read also:Could A Wwe Legend Replace Travis Lets Dive Into The Debate
Table of Contents
- Introduction to IoT SSH
- Prerequisites for Setting Up IoT SSH
- Enabling SSH on Windows 10
- Configuring Port Forwarding
- Setting Up Dynamic DNS
- Enhancing Security Measures
- Using Command Line for IoT SSH
- Troubleshooting Common Issues
- Alternatives to Traditional SSH
- Conclusion and Next Steps
Introduction to IoT SSH
Let’s talk about SSH for a second. SSH, or Secure Shell, is a network protocol that allows secure communication between two devices, even over an unsecured network. When it comes to IoT SSH, the goal is simple: provide secure access to your IoT devices from anywhere in the world without sacrificing security or performance. It’s like having a private tunnel to your devices no matter where you are.
Why Use SSH for IoT?
There are plenty of reasons why SSH is the go-to method for accessing IoT devices:
- Encryption: SSH encrypts all your data during transmission, so prying eyes can’t see what you’re doing.
- Authentication: SSH supports various authentication methods to make sure only the right people are accessing your devices.
- Reliability: Even if your network is unstable, SSH provides a robust and reliable connection, keeping you connected when it matters most.
With SSH, you can remotely manage and monitor your IoT devices with peace of mind, knowing that your data is safe from unauthorized access. It’s like having a digital fortress around your devices.
Prerequisites for Setting Up IoT SSH
Before we jump into the setup process, let’s make sure you have everything you need. Here’s what you’ll need to get started:
Hardware Requirements
- A Windows 10 computer with administrative privileges. Think of this as your control center.
- An IoT device with SSH capabilities enabled. This could be anything from a smart thermostat to an industrial sensor.
- A stable internet connection for both your host and client devices. Without a solid connection, things just won’t work right.
Software Requirements
- Windows 10 with the OpenSSH client and server installed. Don’t worry—we’ll show you how to set that up in a bit.
- A router that supports port forwarding and dynamic DNS. This is how we’ll make sure your devices are accessible from anywhere.
- An SSH client application or command-line interface for remote access. This is your digital key to unlocking your devices.
Once you’ve got all the pieces in place, we can move on to the next steps. Let’s get rolling!
Enabling SSH on Windows 10
Windows 10 already has built-in support for OpenSSH, which makes setting up SSH a breeze. Here’s how you can enable SSH on your Windows 10 machine:
Read also:Rethinking Putins Energy Promises A Closer Look Through Zelenskyys Lens
Step 1: Enable OpenSSH Server
Here’s how you do it:
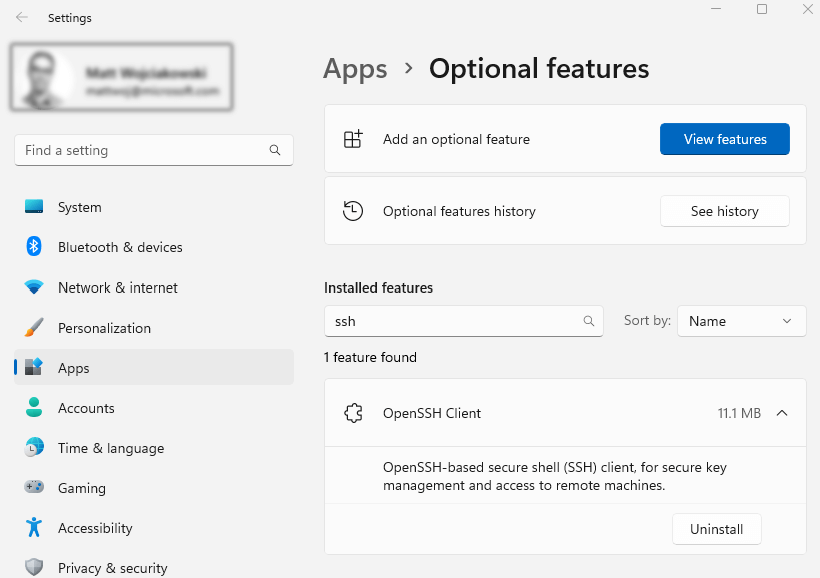
- Open the "Settings" application on your Windows 10 computer.
- Head over to "Apps"> "Optional Features".
- Click on "Add a feature" and search for "OpenSSH Server".
- Select "OpenSSH Server" and click "Install". That’s it—you’ve now installed the SSH server on your machine!
Step 2: Verify SSH Service
To make sure the SSH service is up and running, open a Command Prompt with administrative privileges and type the following command:
sc query sshd
If everything’s working correctly, you should see a status indicating that the SSH server is running. If not, double-check your installation steps and try again.
Configuring Port Forwarding
Port forwarding is like setting up a virtual door that lets external devices connect to your IoT device through your router. Here’s how to set it up:
Accessing Your Router Settings
- Log in to your router’s web interface using its IP address. You’ll usually find this in your router’s manual or on a sticker on the device itself.
- Once you’re in, navigate to the "Port Forwarding" or "NAT" section. This is where the magic happens.
- Create a new rule by specifying the internal IP address of your IoT device and the desired port (usually 22 for SSH). Think of this as labeling your virtual door with a specific address.
Best Practices for Port Forwarding
- Use a static IP address: Assign a static IP address to your IoT device to avoid configuration headaches down the line.
- Choose a non-standard port: Using a port other than the default 22 can add an extra layer of security.
- Regularly review your rules: Keep your port forwarding rules up to date to ensure everything stays secure.
Setting Up Dynamic DNS
Dynamic DNS (DDNS) is like having a personal address book for your IoT devices. It ensures that your devices remain accessible even if your IP address changes. Here’s how to set it up:
Choosing a DDNS Provider
There are plenty of great DDNS providers out there. Some of the most popular ones include No-IP, DynDNS, and DuckDNS. Most of these services offer free plans that are perfect for personal use.
Configuring DDNS on Your Router
- Log in to your router’s web interface.
- Navigate to the "Dynamic DNS" section.
- Enter the credentials provided by your DDNS service. This is like setting up your address book.
- Save the settings and test the connection to make sure everything’s working.
With DDNS configured, you can access your IoT device using a consistent domain name, no matter what happens to your IP address. It’s like having a permanent address for your devices.
Enhancing Security Measures
Security is absolutely critical when setting up IoT SSH from anywhere. Here are some best practices to keep your devices safe:
Use Strong Passwords
Make sure every user account on your system has a strong, unique password. Avoid using default credentials that come with your devices—they’re like leaving the door wide open for hackers.
Enable Key-Based Authentication
Key-based authentication adds an extra layer of security. Generate SSH keys on your Windows 10 machine and configure your IoT device to accept them. It’s like giving your devices a special key that only you can use.
Monitor Access Logs
Regularly check your SSH access logs to catch any unauthorized access attempts early. Think of this as keeping an eye on your digital front door.
Using Command Line for IoT SSH
The Windows 10 Command Line is a powerful tool for managing SSH connections. Here’s how to use it:
Connecting to Your IoT Device
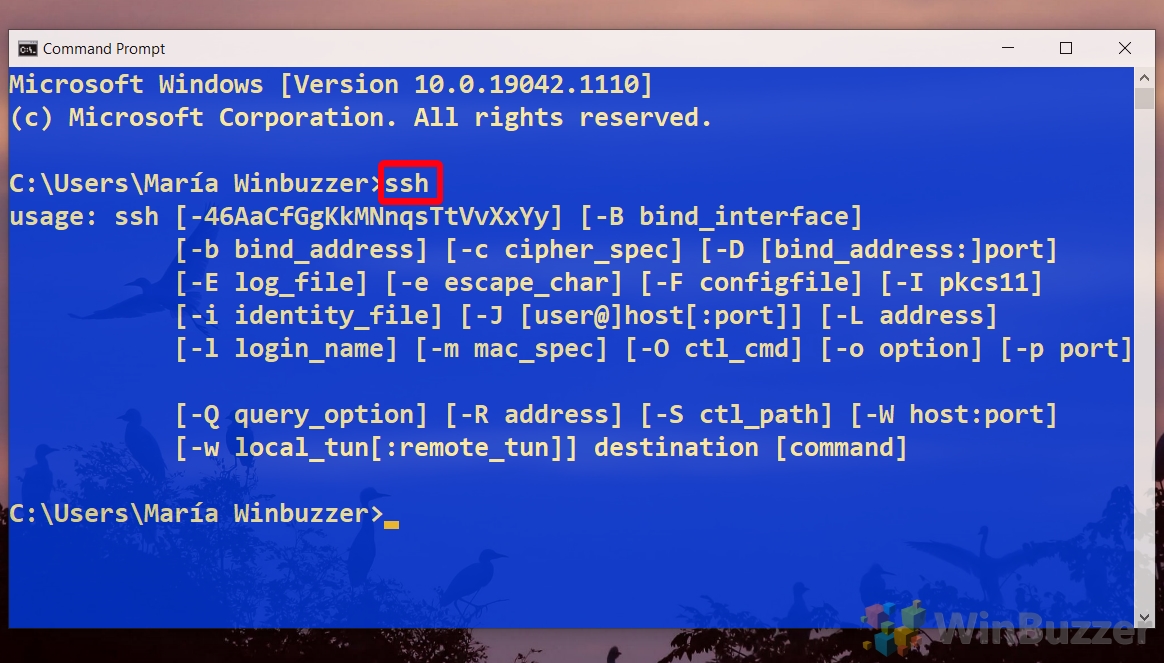
Open Command Prompt and type the following command:
ssh username@your-domain.com
Replace "username" with your IoT device’s username and "your-domain.com" with the domain name provided by your DDNS service. It’s like dialing a number to connect to your device.
Executing Commands
Once you’re connected, you can run all sorts of commands to manage your IoT device. For example, to check the current system status, type:
top
This command gives you real-time info about system resources and running processes. It’s like getting a snapshot of what’s happening inside your device.
Troubleshooting Common Issues
Even the best-laid plans can run into problems. Here are some common issues you might encounter and how to fix them:
Connection Refused
If you get a "connection refused" error, here’s what to check:
- Make sure your router is set up correctly for port forwarding.
- Verify that the SSH service is running on your IoT device.
- Double-check your firewall settings to ensure they allow incoming SSH connections.
Timeout Errors
Timeout errors can happen if your network is unstable or if your DDNS settings aren’t quite right. Check your internet connection and DDNS configuration to fix the issue. It’s like making sure all the lights are green before you hit the road.
Alternatives to Traditional SSH
While SSH is a tried-and-true method for remote access, there are other options worth exploring:
Web-Based Solutions
Some IoT devices come with web-based interfaces that let you manage them remotely without needing SSH. These solutions often include user-friendly dashboards and mobile apps, making it easier than ever to stay connected.
Cloud-Based Platforms
Platforms like AWS IoT and Microsoft Azure offer comprehensive tools for managing IoT devices in the cloud. These solutions come with advanced features like data analytics and device monitoring, giving you more control over your devices than ever before.
Conclusion and Next Steps
That’s it! Setting up IoT SSH from anywhere on Windows 10 Command Line is a straightforward process that can seriously level up your ability to manage remote devices securely. By following the steps in this guide, you can establish a reliable and secure connection to your IoT devices from anywhere in the world. Pretty cool, right?
I’d love to hear about your experiences and insights in the comments below. And while you’re at it, check out some of our other articles to learn more about IoT and related technologies. Together, let’s keep building a safer, more connected world!
References:
[1] Microsoft OpenSSH Documentation
[2] No-IP Dynamic DNS Service
[3] DuckDNS Free Dynamic DNS