Hey there! Let’s talk about SSH (Secure Shell), the game-changing tool that lets you manage remote devices securely, including all those cool IoT (Internet of Things) systems. If you’re looking to connect and control your IoT devices from your Mac without spending a cent, you’re in the right place. This guide will walk you through setting up and using SSH for remote IoT access on Mac—free of charge and packed with security and efficiency.
Listen up, folks. In today’s hyper-connected world, IoT devices have become a part of everyday life, both at home and in the office. From smart thermostats to industrial automation systems, these devices rely on secure communication to function properly. That’s where SSH comes in. It’s like a digital bodyguard that keeps your data safe while you’re managing your IoT devices remotely.
This article is designed to be your ultimate companion, offering step-by-step instructions, expert tips, and practical advice to help you master SSH for remote IoT management on Mac. Whether you’re just starting out or you’re a seasoned pro, you’ll find plenty of valuable insights to level up your skills and make your workflow smoother than ever.
Read also:Eilish Mccolgan The Rising Star In The World Of Running
Table of Contents
- Introduction to SSH
- Benefits of Using SSH
- Preparing Your Mac for SSH
- Configuring IoT Devices for SSH
- Connecting to IoT Devices via SSH
- Securing Your SSH Connection
- Troubleshooting Common SSH Issues
- Alternative Tools for SSH
- Best Practices for Remote IoT Management
- Conclusion and Next Steps
Getting to Know SSH
Alright, let’s dive in. SSH, or Secure Shell, is more than just a protocol—it’s a lifesaver for anyone who needs to communicate securely over unsecured networks. It’s widely used for remote command-line login, file transfers, and even tunneling. For IoT devices, SSH is like a shield that ensures every command and piece of data exchanged between your Mac and the remote device stays encrypted and protected from prying eyes.
Why SSH is a Must-Have for IoT
Here’s the deal: IoT devices often live in environments where security is non-negotiable. SSH steps up to the plate by offering:
- End-to-end encryption: So no one can snoop on your data.
- Authentication mechanisms: Making sure only the right people or systems can access your devices.
- Protection against eavesdropping and data tampering: Keeping your information safe from hackers and other bad actors.
With SSH in your corner, you can manage your IoT devices remotely with confidence, knowing that their security and functionality are in good hands.
Why SSH is Worth Your Time
Using SSH for remote IoT management on Mac comes with a whole host of benefits. Here’s what makes it so great:
- Security: SSH encrypts every bit of data that moves between your Mac and your IoT device, keeping sensitive information private.
- Reliability: SSH connections are rock-solid and can handle interruptions without skipping a beat, which means less downtime during your remote sessions.
- Efficiency: With SSH, you can execute commands and transfer files lightning-fast, saving you time and effort.
- Cost-Effective: SSH is free and open-source, so you don’t have to break the bank to use it.
Getting Your Mac Ready for SSH
Before you can start using SSH to connect to your IoT devices, you need to make sure your Mac is set up properly. Follow these simple steps to get rolling:
Step 1: Turn On SSH on macOS
Here’s the scoop: macOS already has SSH installed, but you might need to give it a little push to get it up and running:
Read also:Pete Davidson And Elsie Hewitt A Beach Getaway To Remember
- Head over to System Preferences and click on Sharing.
- Check the box next to Remote Login.
- Click Allow Access For and choose the users who can connect via SSH.
Step 2: Make Sure SSH is Installed
Open up Terminal on your Mac and type this command:
ssh -V
This will show you the version of SSH installed on your system, confirming that it’s ready to go.
Setting Up Your IoT Devices for SSH
Now that your Mac is good to go, it’s time to make sure your IoT devices are set up for SSH too. Here’s how you can do it:
Step 1: Install an SSH Server
Most IoT devices need an SSH server to work properly. Depending on the operating system your device uses, you can try:
- OpenSSH: Perfect for Linux-based devices.
- Dropbear: Great for lightweight IoT platforms.
Step 2: Set Up User Authentication
It’s important to make sure your IoT device is ready to accept SSH connections using either password-based or key-based authentication. Key-based authentication is the way to go if you want an extra layer of security.
Connecting to Your IoT Devices with SSH
Once both your Mac and IoT devices are prepped, it’s time to establish that SSH connection. Here’s how:
Step 1: Open Terminal
Launch Terminal on your Mac by going to Applications >Utilities >Terminal.
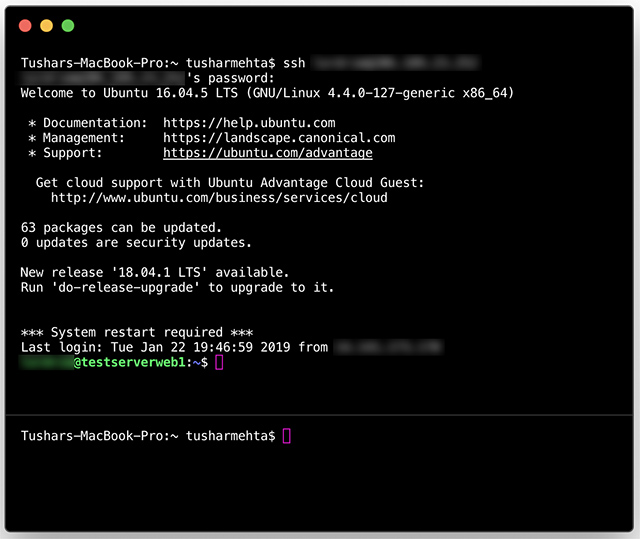
Step 2: Enter the SSH Command
Use this command to connect to your IoT device:
ssh username@ip_address
Just replace username with the login credentials for your IoT device and ip_address with its actual IP address.
Making Your SSH Connection Bulletproof
SSH is already pretty secure, but there are a few extra steps you can take to make it even stronger:
1. Use Strong Passwords
Make sure every user account on your IoT devices has a strong, unique password. Never use the default credentials that came with the device—they’re a hacker’s dream come true.
2. Enable Key-Based Authentication
Key-based authentication cuts out passwords altogether, reducing the risk of brute-force attacks. Here’s how to set it up:
- Generate an SSH key pair using the ssh-keygen command.
- Copy the public key to your IoT device using the ssh-copy-id command.
- Disable password authentication in the SSH server configuration file.
3. Limit Access
Restrict SSH access to specific IP addresses or subnets to keep unwanted visitors out.
Fixing Common SSH Problems
Even if everything is set up correctly, SSH connections can sometimes hit a snag. Here are some common issues and how to fix them:
Issue 1: Connection Refused
Solution: Make sure the SSH server is running on your IoT device and that the firewall allows incoming SSH traffic.
Issue 2: Permission Denied
Solution: Double-check that the username and password are correct. If you’re using key-based authentication, verify the permissions of the authorized_keys file.
Issue 3: Slow Connection
Solution: Fine-tune your network settings and ensure your IoT device has enough resources to handle SSH connections.
Exploring Other SSH Tools
While the built-in Terminal app on Mac is great for most SSH tasks, there are other tools you might want to check out:
1. PuTTY
This is a popular SSH client for Windows users, but it also works on Mac if you use Wine or another compatibility layer.
2. MobaXterm
An all-in-one SSH client that offers some pretty cool features, like session management and file transfer capabilities.
3. Termius
A modern SSH client available for Mac, iOS, and Android, with a user-friendly interface and cloud synchronization.
Tips for Remote IoT Management
To get the most out of SSH for remote IoT management, follow these best practices:
- Stay updated: Regularly update your IoT devices and SSH software to patch any vulnerabilities.
- Monitor activity: Keep an eye on SSH logs for anything suspicious and respond quickly to potential threats.
- Document everything: Keep detailed records of your SSH configurations and procedures for future reference.
Wrapping It Up
Using SSH for remote IoT management on Mac is a powerful and cost-effective solution. By following the steps in this guide, you can securely connect to and control your IoT devices from anywhere in the world. Just remember to keep security top of mind and stay informed about the latest developments in SSH and IoT technologies.
Now it’s your turn! We’d love to hear about your experiences and insights in the comments below. For more in-depth tutorials and expert advice, check out our other articles on IoT and cybersecurity. Together, let’s create a safer and more connected future!